Did you know that over 15,000 house fires happen every year just because dryer vents are blocked or installed wrong? It sounds scary, but the good news is it can be avoided. If you are thinking about Dryer Vent Cleaning in Covington, contact MMI, it really helps to do it the right way. Their experts are the best for that and make sure everything is safe and works properly. In this guide, we will walk you through step by step how to install your Outdoor Dryer Vent so your dryer runs well and your home stays protected.
Why Installing an Outdoor Dryer Vent Correctly Matters
Many homeowners do not realize how important a correctly installed Outdoor Dryer Vent is. If the vent is blocked or not installed properly, it can trap lint inside. Lint is highly flammable, and it can cause a fire if it builds up. Improper venting can also make your dryer work harder to dry clothes. This can waste electricity and wear out your dryer faster.
A well-installed dryer vent allows air to move freely, removes moisture from your home, and prevents potential fire hazards. Taking the time to install the vent correctly now can save you money and stress in the long run.
Read Also: How Long Do Dryers Last? 2026 Complete Lifespan Guide
Tools and Materials You Will Need
Before starting, gather all the tools and materials you will need. Here is a simple list:
- Vent hood with backdraft damper
- Aluminum dryer vent pipe
- Screws and anchors
- Drill and screwdriver
- Metal tape or foil tape
- Measuring tape
- Level
It is important to use the right materials. Avoid plastic vents because they are dangerous and can trap lint. Aluminum vent pipes are the safest choice. They are strong, flexible, and allow air to flow easily.
Step 1: Choose the Best Location
Choosing the right location for your vent is very important. Keep these points in mind:
- The vent should be close to your dryer to reduce duct length
- Avoid placing the vent near doors, windows, or walkways
- Make sure there are no obstacles like shrubs or other vents nearby
Placing your Outdoor Dryer Vent in the right spot ensures good airflow and keeps your home safe. It also makes it easier to maintain and clean later.
Step 2: Measure and Mark the Opening
Next, measure the diameter of your vent pipe. Use these measurements to mark the spot on your exterior wall. Make sure the opening is level and lined up with the interior dryer outlet. A level is important because a vent that is tilted can cause air to flow poorly and may trap moisture or lint.
Step 3: Drill or Cut the Wall Opening
Carefully cut the wall where you marked the opening. Use a drill and saw suitable for your wall type. If your wall has siding, cut carefully so you do not damage it. Make the hole slightly larger than the vent pipe. This allows for easy installation and a tight seal.
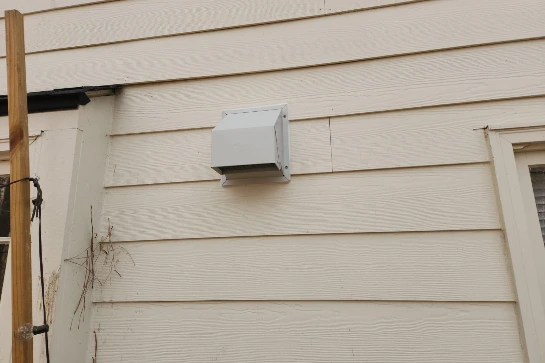
Step 4: Install the Vent Hood
Insert the vent hood into the wall opening. Secure it with screws and anchors. The vent hood has a backdraft damper that opens outward. This is very important because it lets air escape while stopping pests and debris from coming in.
Seal around the vent hood with metal or foil tape to protect it from rain, wind, and insects. This step helps keep your vent safe and working properly for many years.
Read Also: What Is the Best Way to Clean a Dryer Vent Duct Inside and Outside?
Step 5: Connect the Dryer to the Vent
Now it is time to connect your dryer to the vent. Attach the aluminum vent pipe to your dryer and then to the exterior vent hood. Use metal tape to seal all the connections. This prevents air leaks and keeps lint from escaping.
Do not use screws inside the duct. Screws can catch lint and cause blockages. Try to keep the vent pipe as short and straight as possible. Each bend in the pipe can reduce airflow and make your dryer work harder.
Step 6: Test the Vent
After installation, turn on your dryer and check the airflow at the vent hood. Make sure the backdraft damper opens correctly. You should feel a strong and steady flow of air. If there is weak airflow, check for leaks or kinks in the pipe. Testing your vent ensures your Outdoor Dryer Vent works efficiently and safely.
Step 7: Maintain Your Dryer Vent
Even a well-installed vent needs maintenance. Clean your dryer vent at least once a year to remove lint buildup. Check the exterior vent hood for damage and make sure the backdraft damper opens freely. Regular cleaning helps prevent fire hazards and keeps your dryer working efficiently.
Tips for a Safe and Efficient Outdoor Dryer Vent
- Keep the vent pipe short and straight
- Avoid sharp bends or long horizontal runs
- Use aluminum or metal duct, never plastic
- Check for blockages regularly
- Replace damaged vent hoods immediately
Following these tips will help your dryer last longer and keep your home safe.
Benefits of a Properly Installed Outdoor Dryer Vent
Installing an Outdoor Dryer Vent the right way gives many benefits:
- Reduces fire risk caused by lint accumulation
- Improves dryer efficiency and lowers energy costs
- Prevents moisture problems inside your home
- Extends the life of your dryer
- Keeps your home comfortable and safe
A vent that works well protects your family and your home while saving money on repairs and electricity bills.
Summary
Installing an Outdoor Dryer Vent might seem simple, but doing it correctly is very important. A properly installed vent keeps your dryer running efficiently, prevents fire hazards, and protects your home from moisture. By following these steps or trusting MMI’s professionals, you can enjoy safe and reliable dryer performance. Taking a little time now ensures your home stays safe, your dryer lasts longer, and your energy bills stay low.