

A crushed dryer vent hose can look like a small problem, but restricted airflow can make a dryer work harder and take longer to dry clothes. The U.S. Fire Administration advises homeowners to check the venting system behind the dryer for damage, crushing, or restrictions. Here, we explain how to inspect the hose, what a proper repair looks like, and when to replace the connection or call a professional.
Why a Crushed Dryer Vent Hose Is a Problem
Your dryer needs a clear path to push warm, humid air outside. If the hose is flattened, that path becomes narrow. Moist air stays in the drum, lint collects faster, and clothes may need extra time to dry.
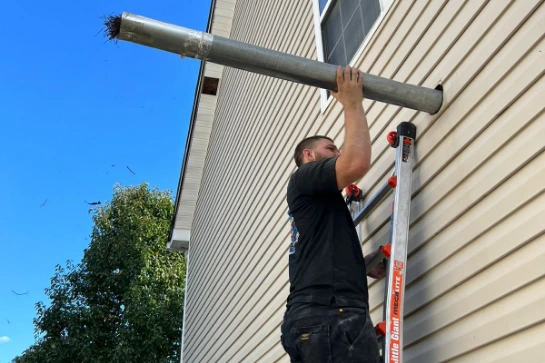
The CPSC explains that lint buildup in the lint screen and exhaust system reduces airflow and raises dryer temperatures. A crushed hose creates another place where lint can catch and build up. Longer drying cycles also use more energy and put extra wear on the dryer. More importantly, restricted airflow and lint buildup are known dryer-fire risks.
Read Also: Why You Should Hire Experts to Clean Out the Dryer Vent Properly
What You Need to Know
- A crushed or bent dryer vent hose slows airflow and can make drying cycles longer.
- Common warning signs include wet clothes, a hot dryer, lint buildup, and weak airflow outside.
- You can reshape a slightly bent metal hose, but you should replace a crushed, torn, or foil hose.
- Metal duct moves air better than plastic or foil accordion duct.
- Unplug an electric dryer or shut off the gas supply before moving the dryer or working near its connections.
Signs the Hose Is Crushed or Bent
Start with the simplest clues:
- Clothes are still damp after a normal cycle.
- Loads take much longer to dry than they used to.
- The dryer or laundry area feels unusually hot.
- Very little air comes out of the outside vent.
- Lint gathers behind the dryer or around the vent connection.
- The hose looks flattened, twisted, or squeezed against the wall.
The CPSC notes that damp clothes or longer drying times can signal a blocked lint screen or exhaust duct. A crushed hose is one possible reason.
How to Check It Safely
You do not need to take the dryer apart to check the visible hose. First, unplug an electric dryer. If you have a gas dryer, turn off the gas supply valve before moving it. Then pull the dryer away from the wall slowly. Look at the hose from the dryer to the wall. Check for flat spots, sharp bends, tears, loose clamps, or lint. Next, run the dryer and go outside. The vent cover should open, and you should feel a steady flow of air.
Do not run the dryer with the hose disconnected. The CPSC advises reconnecting the duct to both the dryer and the outside vent before using the dryer again. If the vent is still blocked, difficult to reach, or your dryer keeps taking too long after basic cleaning, it may be time to bring in a professional. MMI Home Improvement Pro offers dryer vent cleaning in Norcross and nearby areas. A technician can check the hose, clear lint from the vent line, and make sure air is moving properly to the outside. You can book an appointment at a time that works for your schedule.
Can You Fix a Bent Hose?
Sometimes, yes. If the hose is flexible metal and only slightly bent, you may be able to guide it back into a smooth curve. Move it away from the wall, and make sure it isn’t twisted, sagging, or pressed against the dryer. This works when the bend is mild, and the hose has no cracks, holes, or crushed areas. After reshaping it, run the dryer and check the outside vent again. But be careful. A hose that has been crushed once may weaken in that spot. If it keeps bending in the same place, replace it instead of trying to save it.
Read Also: How to Get Rid of Black Mold?
When to Replace Dryer Vent Hose
Replace the hose if it is crushed, torn, badly kinked, rusted, or made of plastic or thin foil. A crushed section traps lint and restricts airflow. The CPSC recommends replacing plastic or foil accordion duct with rigid or corrugated semi-rigid metal duct.
Hose condition What to do
Slight bend in flexible metal hose Gently reshape it and test airflow
Crushed or flattened section Replace it
Plastic or foil accordion hose Replace it with metal duct
Torn, loose, or punctured hose Replace it or repair the connection
Same spot keeps kinking Replace it and change the routing
Lint packed inside Clean it or replace it if damaged
How to Replace the Dryer Vent Hose
Replacing a visible flexible hose is often a simple job, but the steps can vary by dryer and vent setup. Turn off the power or gas first. Move the dryer away from the wall, then loosen the clamps at both ends and remove the old hose. Clean lint from the dryer outlet, wall duct, and outside vent cover before installing the new hose. Use rigid or semi-rigid metal ducts where possible. Keep the run short, straight, and free of sharp turns. Secure both ends with the correct clamps, then run the dryer and confirm that air is flowing strongly outside. Avoid screws that stick into the duct because they can catch lint. Also avoid long, twisted runs of flexible duct, which give lint more places to collect.
Choosing the Right Dryer Vent Hose
Rigid metal duct is usually best for straight runs. A semi-rigid metal duct works better where the dryer needs a little flexibility. Both allow better airflow than plastic or foil duct. Before buying a replacement, check the material, length, and diameter. Use the shortest practical route from the dryer to the outside vent, and leave enough space behind the dryer so the hose does not get squeezed again. Follow your dryer manufacturer’s installation instructions. The right setup can depend on the dryer model, vent route, and local building requirements.
Read Also: Does Hard Floor Drying Prevent Mold Growth?
Mistakes That Cause Repeat Problems
Pushing the dryer too close to the wall. This is the most common reason a hose gets crushed. Leave a little space and guide the hose into a gentle curve.
Using plastic or foil duct. These hoses kink and crush more easily than metal ducts. The CPSC specifically recommends replacing them with metal ducts.
Replacing the hose but ignoring lint. A new hose will not help if the outside vent or wall duct is clogged. Clean the lint screen after every load and clean the vent system periodically.
Using the wrong tape. Regular cloth duct tape can dry out and fail. Use materials made for dryer vent connections.
Running the dryer without a vent hose. This sends moist, lint-filled air into the laundry room and creates an avoidable safety risk.
Summary
A crushed or bent dryer vent hose may seem minor, but it can make every load take longer and put extra stress on your dryer. Check the hose behind the machine, look for flattened or kinked sections, and replace damaged or foil duct with metal duct.