As a resident, you must accomplish some repairs each year in order to keep your home functioning efficiently and safely. One of these is ensuring that your dryer and dryer ducts are in good functioning order and that you keep them clean and free of obstructions. Here you can learn to install dryer vent cover replacement flaps. If you haven’t already, you should include dryer vent cleaning in your regular home cleaning regimen. You should get an inspection and cleaning service once or twice a year.
Instead of heating your home with warm, humid air, the dryer vent flap on your external wall allows the exhaust from your dryer to evacuate your room. The flap prevents the outside elements, as well as small, uninvited insects or other creatures, from entering your home. If the vent flap is destroyed, hot air can fill the space inside the dryer vent. It can also serve as a breeding ground for birds and other insects. To protect your dryer and your household, replace the dryer vent flap.
Required Tools and Materials
Before you begin, make sure you have all the necessary supplies for this DIY dryer vent cap replacement project. It will save you time and hassle if you have all the tools.
- Acrylic caulk
- Metal tape
- New vent cap
- 4-in-1 screwdriver
- Caulk gun
- Tin snips
- Utility knife
Method To Replace Dryer Vent Cover
Remove the exterior vent covers from the outside and cut the old caulk using a knife. A metal dryer vent cover is designed to be lightweight so that it may be readily opened. But this sturdiness also means that you can break it easily. Lint easily clogs the caps, particularly those with several little flaps. Unless you’re meticulous about cleaning, stay away from small flaps. You should get air duct repair and replacement Smyrna GA service from a professional.
Tear apart the duct at the last connection within the home for dryer vent cover replacement flaps. Look for little screws keeping the pipe portions together if they don’t come apart easily. Secondly, cut through the caulk around the borders and detach the bolts or nails that held the cap to the siding. Remove the dryer vent cover, scrape away any old caulk or dirt, and clean the siding to ensure the new caulk adheres.
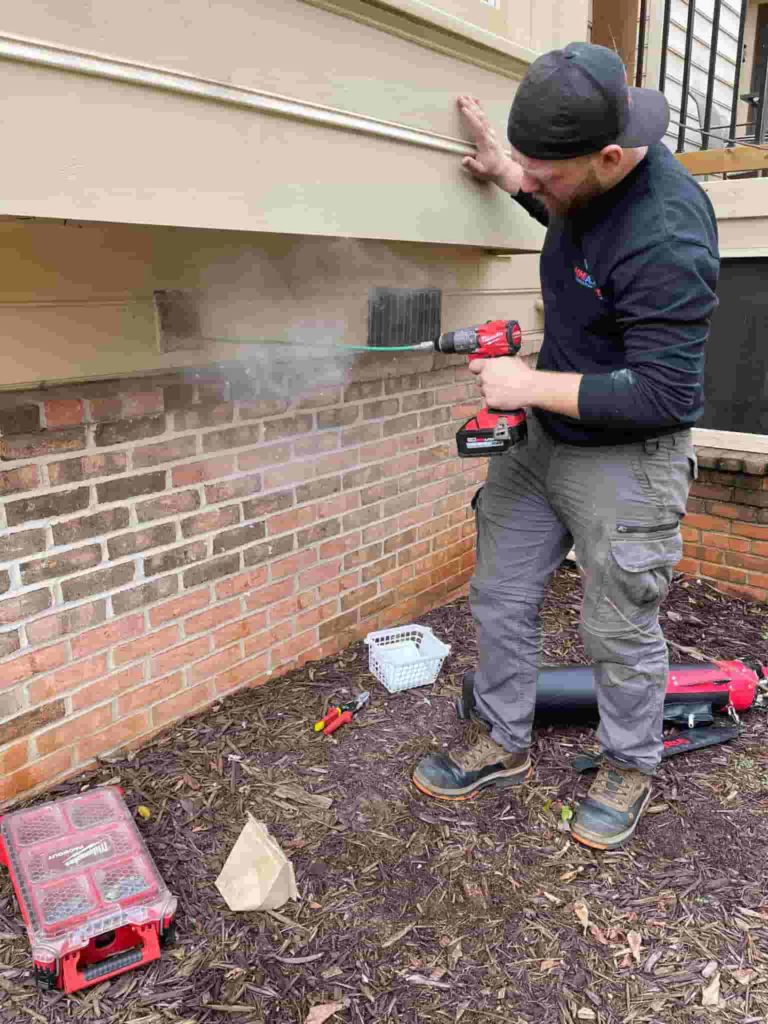
It would help to cut the new vent pipe to a certain length as the previous one and then fit it through the wall. Seal around the edges with a paintable caulk after screwing the cap to the siding. Finally, connect the old duct to the new metal dryer vent cover inside the home. Vent caps are available at most home improvement stores.
Vent Maintenance
Cleaning your dryer’s dryness sensors is a simple chore that can save you money and effort each year. On the inside of the drum, these are normally near and under the door. You should apply isopropyl alcohol to a cotton swab or a small cloth. Apply steady pressure on the sensing bar and rub it until all the dirt and lint are gone. A commercial air duct and dryer vent cleaning Smyrna GA service can be helpful for vent maintenance.
While you’re doing it, quickly wipe off the interior of your dryer’s drum with the rag. It will help your dryer function more efficiently by removing unwanted lint and dryer sheet residue buildup. A clean dryness detector will improve the performance of your dryer and save you money on electricity by allowing it to stop when your clothes are dry enough.
Remove Lint From Lint Trap
Simply incorporate it into your everyday drying routine. Before starting your dryer cycle, ensure the lint trap is clean and free of lint. Every three months or so, you should thoroughly wash the lint filter with warm water and dish soap. It is because lint and drying sheets can create a residue on the trap, which can accumulate over time and reduce its efficiency, perhaps resulting in a fire or increased pressure as air is driven past the increasingly blocked vent.
Before reinstalling the lint trap in the machine, let it air dry for a few hours. Also, if your filter’s panel has any flaws or holes in it, it’s time to get a new one. Lint trap holes can result in a dangerous lint buildup in your ducts.
Clean The Lint Screen
Remove the lint screen filter on your dryer about twice a year and install a shop vacuum tube into the space. Some vacuums will come with a narrow attachment that will fit, but you may want to invest in one specifically designed for the job. Make sure you vacuum the area thoroughly to eliminate any undesirable residue. When you’re finished, reinsert your lint trap.
Examine Your Outside Vents
You should personally inspect your external vent at least once a year. Examine the duct for any breaks, leaking, or signs of insects attempting to enter the house through it. They may reach that location because it provides warmth during the winter. Remove any dirt or accumulation, and check that your vent’s grilles are working fine since they help keep air from recirculating back into your dryer’s ventilation system. It may be better to replace dryer vent flaps and install a new duct that is clearly damaged or worn.