Have you ever wondered how to maintain your roof dryer vent to ensure it works efficiently? Look no further! We have the answer for you. At MMI Home Improvement, we specialize in Dryer Vent Cleaning. With our expert services, your roof vent will be in tip-top shape, promoting better air circulation and reducing the risk of fire hazards. Let us show why MMI Home Improvement is the best choice for your dryer vent cleaning needs.
Understanding the Roof Dryer Vent System
When we use a dryer to dry our clothes, it creates hot, damp air that needs to go outside. That’s where the roof dryer vent system comes in! At MMI Home Improvement, we help keep your home safe and clean with our expert services! Need Dryer Vent Cleaning in Alpharetta? We’ve got you covered! Our friendly team will clean your dryer vent quickly and make sure it works perfectly. Trust MMI Home Improvement for all your home needs!
So, the roof vent system is like a particular tunnel that helps the hot air from the dryer to escape outside. It keeps our homes safe and cozy and our clothes nice and dry!Remember to take care of our dryer and the vent system to keep everything running smoothly.
What is a Roof Dryer Vent System?
A roof dryer vent system is like a tunnel for the hot air to escape from the dryer and go outside our homes. It’s like a chimney for the dryer!
How Does it Work?
When we turn on the dryer, it blows hot air through a vent tube. This vent goes through the walls and up to the roof. The hot air goes outside, leaving our clothes dry and soft!
Why is it Important?
A roof dryer vent system is essential because it keeps the hot, damp air away from our homes. If the hot air stays inside, it can make our homes too hot and cause problems like mold.
Gathering the Necessary Tools and Safety Precautions
- Getting Ready:
Getting all the necessary instruments together is crucial before beginning any endeavor. Let’s tick off our list item by item first. Remember to put our safety first by donning our safety goggles and asking an adult to assist us.
- Gathering Tools:
To begin, gather supplies such as a ruler, scissors, glue, and markers. We can measure, cut, stick, and decorate our project with the aid of these tools. It will be simpler to work with them all together.
- Finding a Safe Workspace:
Find a clean, safe workspace next. It might be a desk or a table. Ensure that there is sufficient light to see what you are doing. Having a clear workspace will improve our ability to concentrate.
- Safety Precautions:
It’s important to comprehend a few safety measures before we start. Always cut away from yourself while using scissors or any other type of sharp equipment. Never play with or run around with scissors.
- Ask for Help:
If you need assistance or explanation, don’t hesitate to ask an adult. They’ll be pleased to help and ensure that everything is secure.
It is imperative to gather the required tools and take safety precautions before beginning any activity. We may have a great time producing our masterpiece if we are prepared and safe. Let’s get ready, gather our equipment, and always put safety first!
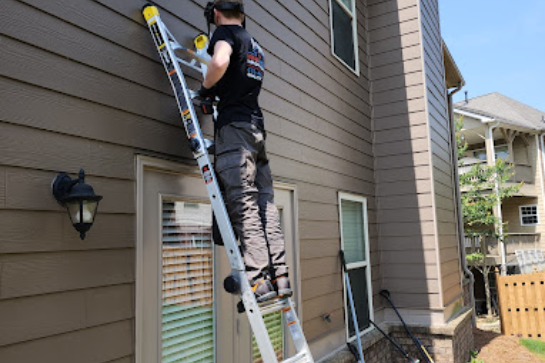
Step-by-Step Guide to Cleaning the Roof Dryer Vent
Step 1: Gather Your Supplies
You will need a ladder, a screwdriver, a vent brush, and a bucket.
Step 2: Safety First
Ask an adult to help you set up the ladder securely against the wall.
Step 3: Remove the Vent Cover
Use the screwdriver to remove the vent cover carefully.
Step 4: Brush the Vent
Take the vent brush and gently clean it inside the vent to remove any lint and debris.
Step 5: Check the Vent Hose
Look inside the vent hose to see if there is any lint buildup. If there is, use the brush to clean it out.
Step 6: Clean the Vent Cover
Remember to clean the vent cover itself before putting it back.
Step 7: Reattach the Vent Cover
Use the screwdriver to put the vent cover back in its place.
Step 8: Double-check Everything
Make sure everything is securely attached, and there are no loose parts.
Step 9: Clean Up
Put away all your tools and clean up any mess you make during the cleaning process.
Step 10: Test the Dryer
Ask an adult to turn on the dryer and check if the air flows properly through the vent.
Cleaning your roof dryer vent is essential to protecting your home from fires. By following these simple steps and having an adult help you, you can ensure that your dryer works efficiently and safely.
Read our guide about Dryer Vent Cleaning:Hire/DIY?
Best Practices for Roof Dryer Vent Maintenance
When you have a dryer in your house, it’s essential to take care of it so it can work properly. One thing you need to do is to keep the vent clean. Here are some easy steps to follow!
- Look for the Vent: First, find where the vent is on your roof. It’s usually a small pipe sticking out. Ask an adult for help if you can’t find it.
- Safety First: Always ask an adult to help you before you start. Climbing on the roof can be dangerous, so having someone supervise you is essential.
- Remove Lint: Lint is the fuzzy stuff that comes off your clothes in the dryer. Ask an adult to use a special brush to clean out the lint from the vent.
- Keep it Short: Try to keep the vent as short as possible. Long vents can trap more lint and make it harder to clean.
- Replace Damaged Parts: If you notice any broken or damaged parts, tell an adult so they can fix or replace them.
Following these simple steps, keep your vent in good shape and ensure your clothes dry faster and safely! Remember to always ask for adult help and stay safe!
Safety Tips and Final Considerations for Roof Dryer Vent
Before you start, always ask an adult for help. Safety is the most important thing!
- Choose the Right Spot: Find a good spot for the vent on the roof. It should be away from windows and doors.
- Use the Right Tools: You will need a ladder and some tools. Ask an adult to help you with them.
- Clear the Area: Ensure the area around the vent is clear. Remove any leaves or debris.
- Secure the Vent: Ask an adult to help secure the vent tightly to the roof. This way, it won’t fall off.
- Clean Regularly: It’s essential to clean the vent regularly to prevent lint buildup. Lint can cause fires!
Final Considerations for Roof Dryer Vent
- Ask for Help: Always ask an adult for help if you need clarification. They will guide you safely.
- Check for Damage: Check the dryer vent every few months for any damage or cracks. If you find any, get it fixed with an adult’s help.
- Don’t Play Around: Never play near the vent. It’s not a toy and can be dangerous.
- Stay Away from Heat: The vent can get very hot, so don’t touch it while it’s in use.
Remember, safety comes first! Follow these tips and always have an adult with you. Keeping the vent in good condition will help prevent accidents and keep your home safe.