Are you an HVAC contractor? If yes, then you must be aware of the challenges you have to face when replacing ductwork between building floors. As you know that the ductwork should be in good condition with all required fittings, so it is necessary to replace it regularly. Now the question is how to replace ductwork between floors and if you want the answer, read this article.
How to Replace Ductwork Among Floors?
The good news is that the technique is simple, and you just need to follow some basic steps. Firstly, you must install a fake return grill. You need to make a hole in the floor after you detach the carpet. And then, reinstall the air ducts.
When Is the Right Time to Install a New HVAC Duct?
It is crucial to search for the simplest methods that will help you determine when you need to install new ductwork. However, if something is inappropriate with your ductwork, you might get a clue. It will guide you on what to search, smell or hear to detect the problem.
Consider replacing your old ducts, if you observe any of the following signs:
Dusty Surroundings
If your home is dustier than usual, it indicates something is wrong. The probability is that your duct might have holes or fissures, and it might not be adequately sealed. However, dust from the external ductwork bursts inside, moves via the ducts and invades your indoor environment. So, you might require the help from MMI regarding Air Duct Cleaning in Buford.
Varying Temperature
Did you ever observe that some part of your home is warmer than others? If yes, it can hint towards a leakage in your HVAC ductwork. However, it is more likely to happen on lower ground floors. So, in this case, you might have to insulate the ductwork, otherwise, it will damage the overall HVAC efficiency.
Foul Smell
If you sense a foul smell emerging from your ductwork, chances are that it might be infected by mold growth. You should know that condensation occurs when warm and damp air moves through the chilled ductwork.

Noisy HVAC System
By default, your HVAC unit must function quietly. However, if its operation is noisy, chances are your ductwork might be too narrow that it does not allow air to escape. Another reason can be that your ductworks are imbalanced for your system.
How to Replace Ductwork Between Floors in 3 Simple Steps?
You might observe how critical it is to care for your HVAC ducts, or you may have to face many problems and huge expenditures. A few common HVAC issues include leaking water from basement ductwork. So, always be conscious of these basic steps.
However, the method to replace ductwork between floors might be challenging. The reason is your ductwork’s extensive distribution all through the building. Besides, it is also a sensitive structure.
You might risk harming your HVAC unit if you don’t bother to frequently change the ductwork (when required). The entire HVAC efficiency might be troubled if these are unbalanced or inappropriately insulated so, here is what you need to do:
Which Tools Do You Require?
- Air Grid
- Drilling Device
- Ductwork Sealant
- Carpeting Kicker
After gathering all the required tools, you may proceed with the procedure.
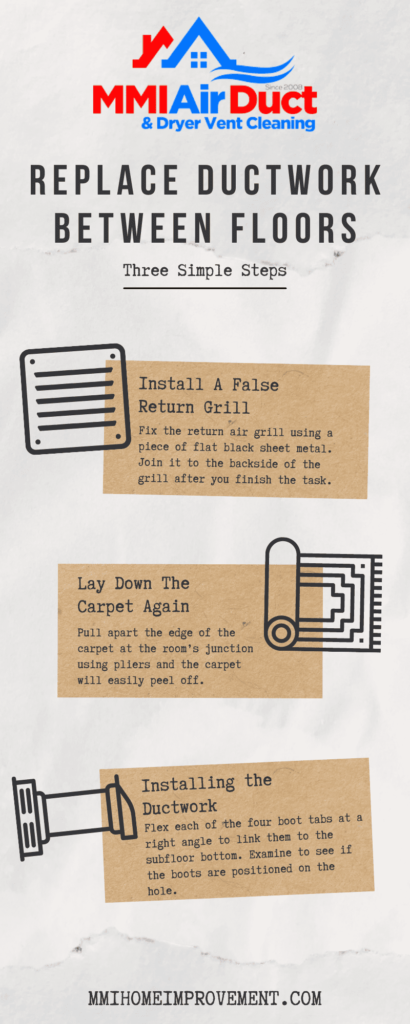
Step 1: Install a False Return Grill
If you want access to your ductwork, cut down an access hole in the roof at the basic level in a vital position. The most common duct size is 0.25-inch x 24 inches, which is perfect to fit among the joints of a majority of floors. The mainstream installers believe that the access hole can extend to a 100 sq. ft. region.
Fix the return air grill using a piece of flat black sheet metal. Join it to the backside of the grill after you finish the task. There might be no ductwork connected. However, there might be a return grill that amplifies as an entrance passage. It disappears when the dwellers become accustomed to it within a few days. And you can easily remove it later to install phone or computer wiring.
Then fix the faux grill behind the neighboring barrier or in the next room if you require more access. So, they might not be noticeable from one position.
Step 2: Lay Down the Carpet Again
Under majority carpets, you may find only plywood or particle boards. Take off the carpet, and cut through the plywood to obtain access to the ductwork installed among floors.
It is much more convenient than clearing water from the carpet. Pin strips along the edge of the room help keep the carpet intact. As you stretch the carpet onto the pin strip, the tiny spikes keep it in position.
Then, pull apart the edge of the carpet at the room’s junction using pliers. Next, keep dragging, and the carpet will easily peel off. After this, carefully take away the padding that is usually linked using staples. You will be able to successfully reveal the plywood.

Use the below code to Embed this infographic
Using a skill saw, cut off an access hole via plywood. Make the cut where plywood is pinned down on the floor joist. Then, take off the plywood and follow subsequent steps to install the HVAC ductwork system.
Step 3: Installing the Ductwork
It is the most basic part. Head towards the position where you have placed the boot under the subfloor. Flex each of the four boot tabs at a right angle to link them to the subfloor bottom. Examine to see if the boots are positioned on the hole. Also, make sure the tabs are flat with the subfloor.
Use a drill machine to make a hole of 0.25 inches. Be careful when using the machine. If you want to appropriately seal the region and prevent seepages, apply duct sealant to any fissures or holes, or take help from MMI specialists for Air Duct Sanitizing in Buford.
Then, head towards the room directed by the boot. The foundation of the floor register needs to glide into the hole. Push it down unless the register’s outer projections are even with the finished floor.
However, if the floor duct comes with fasteners, use it to fix it to the floor. Or else, it will just gather in the gap. Use a carpet kicker to grab the carpet back on the pinstripe. It is a complete overview of replacing ductwork between floors, that you can easily follow to enjoy the best HVAC performance.
