A few months ago, I started noticing my home felt stuffy even though the HVAC was running. Some rooms were warmer than others, there was a faint musty smell in the air, and my energy bills had gone up unexpectedly. When I checked, I found my air ducts were clogged with dust, dirt, and even a bit of mold. It was a wake-up call about how important a thorough cleaning and deodorizing of air ducts really is. However, if you’re dealing with similar issues, it is a good idea to call for HVAC cleaning services in Roswell.
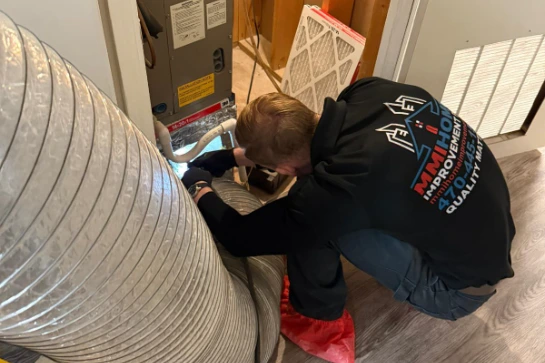
I personally recommend MMI Home Improvement Pro, as they handled my ducts efficiently and made a noticeable difference in airflow and air quality.
Why a Thorough Cleaning Makes a Difference
Air ducts carry air throughout your home, but over time, they can collect dust, dirt, mold, and even pet hair. When ducts are clogged, it can lead to:
- Stuffy rooms and uneven temperatures
- Musty or unpleasant odors
- Poor air quality that triggers allergies
- Higher energy bills because your system works harder
Myth: “Air ducts don’t need cleaning unless something is visibly wrong.”
Reality: Even hidden dust and allergens can affect air quality and HVAC efficiency. A thorough cleaning improves airflow, reduces odors, and helps lower energy bills.
Read Also: When to Call an HVAC Cleaner: 7 Signs You Shouldn’t Ignore
Essential Items for a Proper Duct Cleaning
Before starting, gather these tools for a proper cleaning:
- A vacuum with a HEPA filter
- Brushes and flexible rods for reaching inside ducts
- Screwdriver or drill to remove vent covers
- Microfiber cloths
- Non-toxic duct deodorizer or sanitizer
- Gloves, mask, and goggles for protection
Myth: “You can just use a regular vacuum and a rag.”
Reality: Ordinary vacuums don’t reach deep enough and can blow dust back into the home. Proper tools make sure a safe, thorough cleaning.
Step 1: Turn Off Your HVAC System
Start by turning off your HVAC system at both the thermostat and the breaker. This keeps dust from spreading while you work and protects the system from damage during cleaning.
Step 2: Remove and Clean Vents
The vents and grilles are usually the first places dust builds up.
- Remove all vent covers carefully
- Wash them in warm, soapy water and let them dry completely
- While they are off, vacuum around the vent openings to catch loose dust
Clean vents allow air to flow freely once the system is running again.
Step 3: Vacuum and Brush the Ducts
Now it’s time for a thorough cleaning inside the ducts:
- Insert the vacuum hose as far as it will reach
- Use brushes or flexible rods to loosen dust from the duct walls
- Work section by section to make sure no debris is left behind
This step helps remove built-up dust, pet hair, and small debris that reduce airflow.
For detailed insight, read the article Air Duct Cleaning Facts: What You Need to Know?
Step 4: Deal with Mold and Mildew
If you notice a musty smell, there may be mold in the ducts:
- Wear protective gear when handling moldy areas
- Use a non-toxic sanitizer or mold cleaner designed for HVAC systems
- Apply carefully to avoid spreading spores
Cleaning and deodorizing at this stage ensures the smell is gone and keeps the air healthy.
Step 5: Clean the Blower and HVAC Components
Dust can accumulate in the blower, coils, and other parts of the system:
- Vacuum the blower fan and surrounding areas
- Wipe accessible coils with a microfiber cloth
- Avoid using water on electrical parts to prevent damage
Cleaning these parts is an important part of a thorough cleaning that helps the system run efficiently.
Step 6: Apply a Duct Deodorizer
After cleaning, deodorizing makes the air smell fresh:
- Choose a non-toxic, HVAC-safe deodorizer
- Lightly spray it into the ducts while the system is off
- Turn the system on low for a few minutes to spread it evenly
This step helps remove lingering odors from dust, mold, or pets.
Step 7: Reassemble and Test
Finally:
- Reattach vent covers and grilles
- Turn the HVAC system back on and check airflow in all rooms
- Listen for any unusual noises that might indicate leftover debris
A final check makes sure your thorough cleaning was successful and everything is working properly.
Tips to Keep Air Ducts Clean
To prevent future buildup:
Change Filters Often: Try to change your air filters every one to three months. This keeps the air clean and helps your system work better.
Get a Yearly Checkup: Ask a professional to clean and check your system once a year. They can find small problems before they get worse.
Check Moisture: If your home feels damp, use a dehumidifier. It helps stop mold from growing in the ducts.
Keep Your Home Clean: Dust and vacuum often. When your home is clean, less dirt and dust go into the air ducts.
Regular care makes it easier to maintain clean ducts and healthy air.
Myth: “Cleaning once is enough for years.”
Reality: Ducts naturally accumulate dust over time. Regular maintenance prevents blockages and odors.
When You Should Call a Professional
Sometimes, DIY cleaning is not enough. Consider a professional if you notice:
- Persistent musty or foul odors
- Visible mold inside ducts
- Signs of pests
- Heavy debris that’s hard to remove
Professionals have the right tools to perform a thorough cleaning safely and efficiently.
Myth: “DIY is always enough.”
Reality: Some situations need professional equipment for a thorough cleaning that is safe and complete.
Summary
A thorough cleaning and deodorizing of air ducts can make your home feel fresh and comfortable. Clean ducts help air move better, smell nicer, and can even lower your energy bills. By following these simple steps and doing regular cleaning, you can keep your home healthy and cozy all year long.